How to: Rollback to a previous version of Windows from Windows 10
NOTE: Please be aware the Windows.old folder located at the root of the local disk where Windows 10 is installed will be deleted after 30 days automatically. The Windows.old folder is used to facilitate the rollback. So please perform any rollback within 30 days or this option will no longer be available. Otherwise, create a backup before upgrading to Windows 10.
See links to resources about backing up by clicking the link for the respective version of Windows you are running: Windows XP, Windows Vista, Windows 7, Windows 8/8.1Summary
Throughout the history of Windows revisions, Microsoft has included
an option to uninstall the operating system when you upgrade to a newer
version. My recollection of this capability goes back to Windows ME
which included the option to uninstall the operating system and restore
to a previous version of Windows (I was running Windows 98 SE at the
time). Microsoft has supported this functionality in its NT based
versions of Windows too, albeit not in a seamless way. The ability to
restore a Windows 8.1 installation to Windows 7 required knowing some
command line operations that in some instances didn’t guarantee the
process would go according to plan. With Windows 10, it seems Microsoft
has listened and has provided a welcome option to its recovery tools to
make it easy to uninstall Windows 10 and go back to your previous
version of Windows. This option can be handy for diagnostics purposes,
trial and error or to simply go back to a previous version of Windows
that works better with your PC.
Please keep in mind, this only works with Windows 7 and later.
Because prior versions of Windows such as Windows Vista and Windows XP
can only migrate to Windows 10 through a custom install, the command
line operations remain your best choice if you do decide to go back.
Also keep in mind, if you do a custom install over Windows 7 or later,
the Rollback option is not available. This only works if you had done an
in place upgrade from Windows 7 or later.
Start by opening Settings – Click Start > Settings or type Settings in the search bar and click it or press Windows key + i


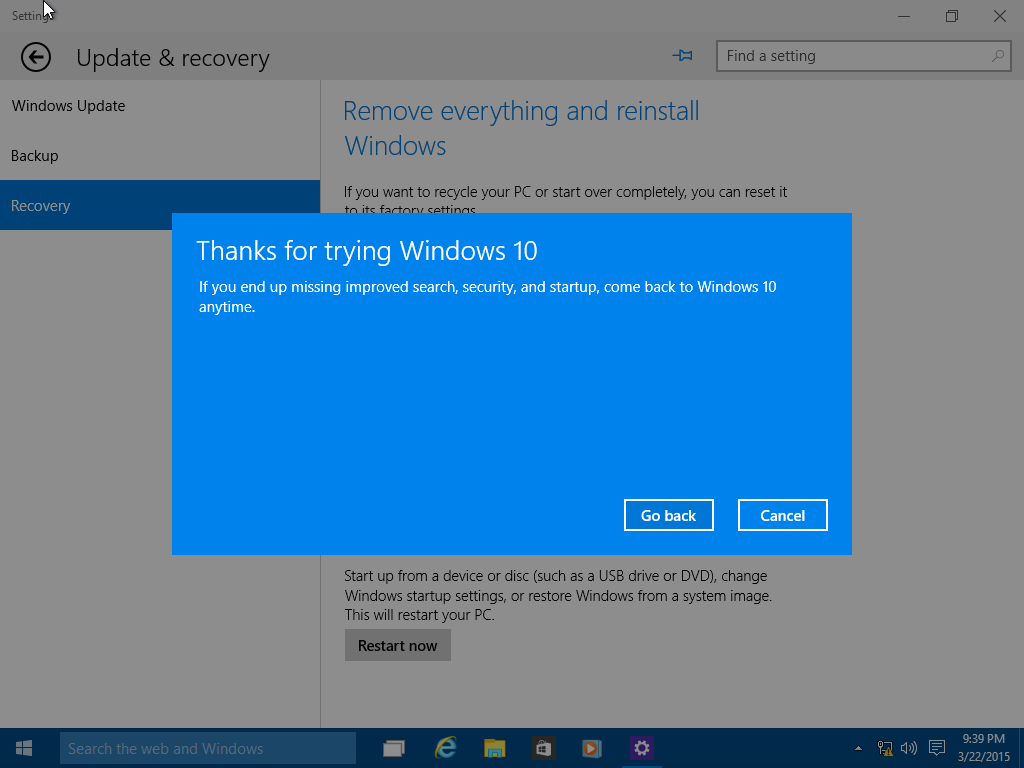


If you cannot load the Windows Desktop, you can initiate a Rollback using the following method:

Hold down the shift key on your keyboard while clicking the Power button on the screen
Continue to hold down the shift key while clicking Restart
Continue to hold down the shift key until the Advanced Recovery Options menu appears

Click Troubleshoot


Click Go back to the previous version of Windows
No comments:
Post a Comment