https://www.makeuseof.com/windows-11-select-edition-during-install/

So, how do you force Windows 11 Setup to show the select edition screen during installation? You can achieve this by modifying the bootable media or the ISO image to include the EI.cfg file. Here we show you how to select the Pro edition while installing Windows 11.
Why Doesn’t Windows 11's Setup Display the Select Edition Screen?
Nowadays, Microsoft doesn’t publish different editions of the Windows OS on its server. Instead, the default multi-edition ISO file includes all the editions ( Home, Pro, Education, Enterprise).
During a clean install, Windows Setup looks for the traces of the previous installation including the OEM (Original Equipment Manufacturer) license tied to your computer’s motherboard to determine the correct edition of the operating system to install.
This is a convenient feature for many as you don’t need to activate your computer after installing Windows 11 manually. But this also means you don’t get to select the Windows 11 editions during a clean install.
To fix this problem, you can include a Windows Setup configuration file to force Windows Setup to display the select edition screen during installation. It is an optional setup configuration file that you can add to automate the edition selection and product key verification steps during Windows installation.
How to Force Windows Setup to Show the Windows 11 Editions During Clean Install

- First, you need to create a bootable Windows 11 USB drive. If you don’t have an ISO, you can download the Windows 11 ISO image from the Microsoft server.
-
Next, open a new Notepad file. To do this, press Win + R, type notepad, and click OK.

-
In the Notepad window, copy and paste the following lines:
[Channel] _Default [VL] 0 -
Press Ctrl + S to open the Save as dialog.
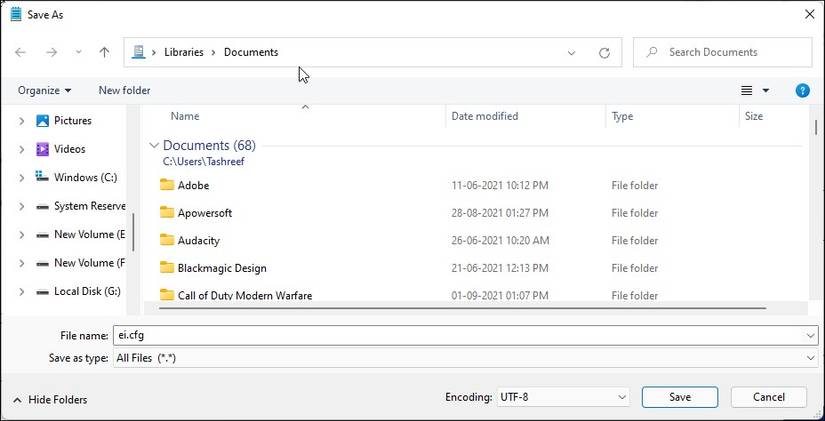
- Here, type the file name as ei.cfg. Next, click the drop-down for Save as type and select All Files.


- Click the Save button to save the file to your PC.
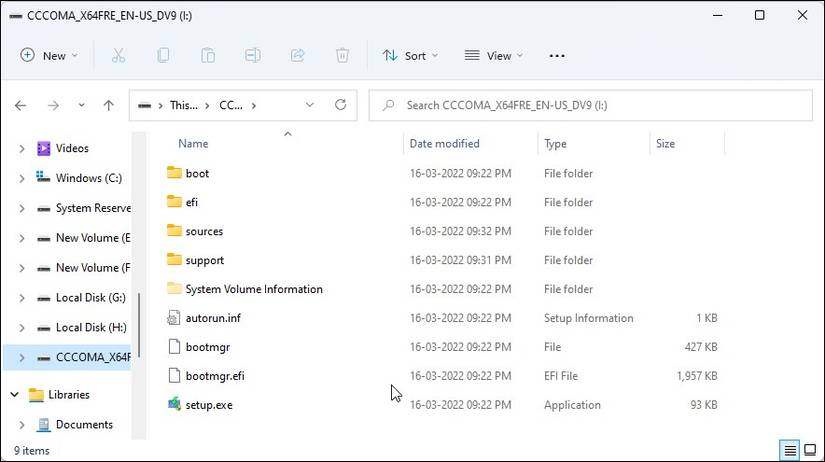
- Next, connect the bootable USB flash drive to your PC.
- Press Win + E to open File Explorer.
- In the left pane, click on This PC.
-
Next, double-click on the bootable USB flash drive to view its content.
-
Double-click on the Sources folder to open it.
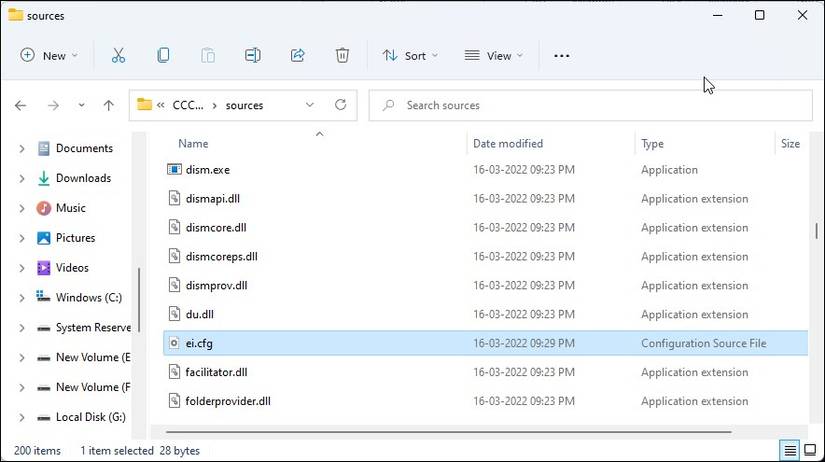
- Now, copy and paste the ei.cfg file into the Sources folder.


No comments:
Post a Comment